Modeling a Workflow
Modeling a workflow involves placing and connecting nodes that represent various states in the workflow. Refer to the topic Nodes Area in Workflow Designer to understand the various node types that represents the required state.
Follow the steps below to model a workflow:
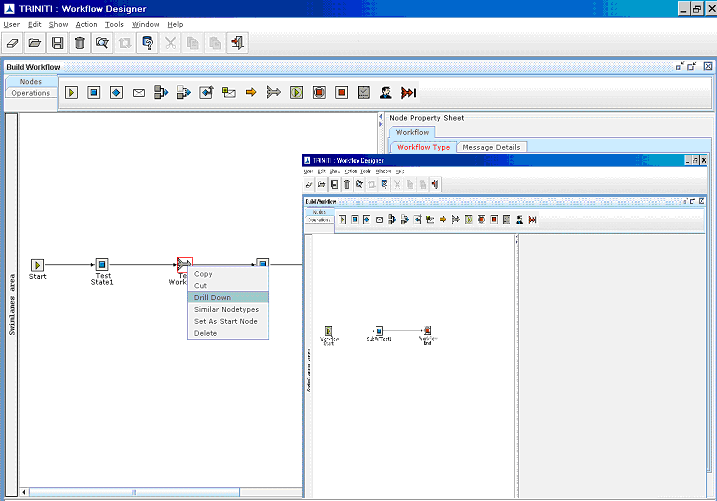
- Right-click on the workflow Type node, and then select Drill Down on the pop-up menu. You see another work area. Refer to Figure 51 that illustrates navigation (1 to 2) from one work area (containing Workflow Type node) to other (containing workflow states).
- Place the node that represents your first state in the workflow.
- Enter state name and description for the state. Select GetController Name, and Modification Type from the list.
- Place another node that represents your second state in the workflow. Enter all the properties for the second state.
- Click on the Operation node and connect the first node (state) and the second node by dragging cursor from the first node to the second.
- Place the nodes representing subsequent states in the workflow and connect the nodes using the Operation node.
- After all the states are configured, right-click anywhere on the work area, and select Drill Up on the pop-up menu. You see the work area on which you placed the Workflow node.
- Click Operations tab and then click Create.

Figure 76:
