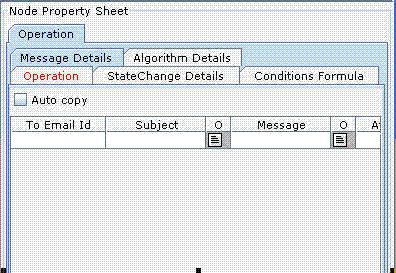
The following are the properties for Operation node:
Operation |
|||
# |
Property |
Description |
|
1 |
Operation Name |
Enter a name for the operation. |
|
2 |
Description |
Enter the description for workflow type |
|
3 |
Put Controller Name |
Select the Put Controller from the list of values |
|
4 |
Viewer Instance Set |
Enter name of the ViewerInstanceSet to which the application needs to send the results of the operation. |
|
5 |
Viewer Instance |
Enter name of the configured Viewer Instance that takes results of this operation as input. |
|
6 |
Operation Type |
Select the operation type from the list of values. The options are NORMAL, ACCEPT and REJECT. |
|
7 |
Image File |
Select the image file from list of values to display image on operation button of build frame. |
|
8 |
Effective Start Date |
Enter a date after which user can perform this operation. |
|
9 |
Effective End Date |
Enter a date before which user can perform this operation. |
|
10 |
Export Sets |
Export Conditional State Change Sets to excel sheet |
|
Message Details |
|||
# |
Property |
Description |
|
1 |
To Email ID |
Enter the Email ID of the person to whom the notification message will be sent |
|
2 |
Subject |
Enter subject of the mail that will be sent to the user |
|
3 |
Attachments |
Enter the property name for which the file is attached. |
|
4 |
Message |
Enter the notification message of the mail that will be sent to the user |
|
5 |
Include child |
Select this checkbox to replace the token value from that of the child node |
|
6 |
Error Subject |
|
|
7 |
Error Message |
Enter a message for the error report notification |
|
8 |
To User |
Enter the user name |
|
9 |
To Role |
Enter role assigned to the user |
|
10 |
Notification Type |
Select the notification type from the list of values. The options are NORMAL, ACCEPT_REJECT. |
|
11 |
Notification Generation Type |
Select the notification generation type from the list of values. The options are EVENT BASED, TIME BASED. |
|
12 |
Explode Role |
|
|
Conditions Formula |
|||
# |
Property |
Description |
|
1 |
Node Type |
|
|
2 |
Formula (IF) |
|
|
3 |
Formula (THEN) |
|
|
Algorithm Details |
|||
# |
Property |
Description |
|
1 |
Algorithm Name |
Select the required algorithm from the list of values. The options are Normal, Round Robin, and Variable Dependent. |
|
2 |
To Mail Details |
Enter the details to whom the mail is to be sent. |
|
The State Change Details tab consists of two tabs, namely, State Change Details and Properties.
State Change Details � State Change Details tab |
||
# |
Property |
Description |
1 |
Set |
Enter the set number. |
2 |
Class |
Enter the class name. |
3 |
Type |
Select Type from the list of values. The options are JAVA and SQL. |
4 |
Connection Name |
Select the connection name from the list of values. |
State Change Details � Condition State Change Props tab |
||
# |
Property |
Description |
1 |
Property Name |
Enter the name of the property |
2 |
Operator |
Select the operator from list of values |
3 |
Property Value |
Enter the property value |
4 |
Display |
Select the checkbox to display the property in the error report. |
You can enter tokens, which will serve as parameters and take values that are entered by users in the property sheet while moving a model from one state to another. The token that you enter should correspond to the property configured for the model or node at the front end.
The value entered at To Email ID field is the token that takes the Email ID of the person who is assigned to a particular application/module.

Figure 33