The information that you need to configure for class properties is grouped into the following categories:
You can see tabs corresponding to these categories on the lower right pane of Viewer Configuration screen as shown in Figure 168.
Column Info: Click this tab to configure column characteristics. You see the following screen when you click this tab:

Figure 238:
Column Info |
|
|---|---|
Characteristic |
Description |
Category |
Enter a name under which this property should appear. The category name that you enter here will be taken as label for the tab under which this property will appear. |
Data Type |
This is for your reference. The data type of the properties appears in this column. You don't need to enter anything here. |
Format |
Specify format for the properties of data type date and timestamp. Click the cell in this column to invoke a dialog that lists the available formats. |
Column Width |
Enter or select (from list of values) the column width. |
Group Function |
Select the checkbox in this column corresponding to the property for which the group function needs to be applied. "SUM" is applied as a default group function. |
Property Type |
Select the property type from dropdown list. Select 'Normal' for normal view of report. Select 'Document' type to provide upload/download facility for a report. Select 'Password Field' type for hiding the details of required columns. |
Display Info: Click this tab to configure display characteristics for the class properties.

Figure 239:
Display Info |
|
|---|---|
Characteristic |
Description |
ToolTip |
Enter text that you want to appear as tool tip for the property. |
Display |
Select this check box to display this property in the form. Do not select this check box if you want to restrict this property from appearing in the form. |
Coloring |
This checkbox will be checked when formatting is done based on a condition. |
Function |
Function that is applied for a column of the view. Example: Sum, Average etc. |
The Viewer Configuration Pane allows the user to apply conditional format as a default to a view. Select the property for which conditional format need to be configured. Click on the column beside the Function column corresponding to the selected property row. The Conditions dialog box appears.
The selected property name is displayed at Column Name. Click New. The Conditional Format dialog box appears. For formatting the selected property column using a condition refer to the Viewer-User Manual.
LOV Info: Click this tab to specify Find Definition Templates (FDTs) to the properties. You see the following screen when you click the Lov Info tab.

Figure 240:
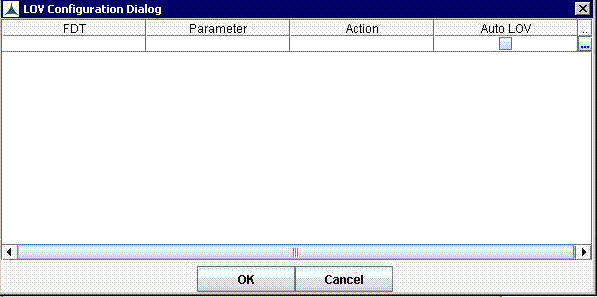
Click on any row under LOV Info. The LOV Configuration Dialog box is displayed:

Figure 241:
LOV Info |
|
|---|---|
Characteristic |
Description |
FDT |
Specify an FDT that fetches a list of values for this property. This allows user to select a value for the property from the list. |
Parameter |
Specify a parameter in the FDT that corresponds to this property. |
Action |
Select the type of action for which list of values needs to be displayed. Clicking on the Action column will display the available options. |
Auto LOV |
Select this checkbox for displaying the list of values automatically when a selected action is performed. |
Drill Down: Click this tab to specify other viewer instances, and TAB applications that need to be accessed from the current viewer instance. This configuration is made at viewer instance level and not at the class property level.
Before you configure drilldown list, you need to specify whether the drilldown is at cell level or row level. If the drilldown is at cell level, drilldown list appears only when you right click the cells displaying property values. On the other hand, if the drilldown is at row level, the list appears when you right click cell anywhere on the form.
The following screen is displayed when you click Drill Down tab:

Figure 242:
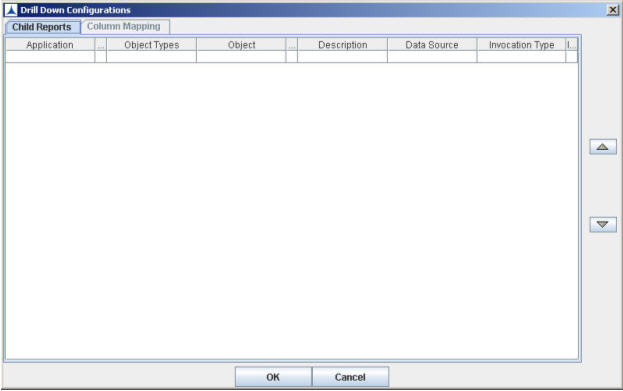
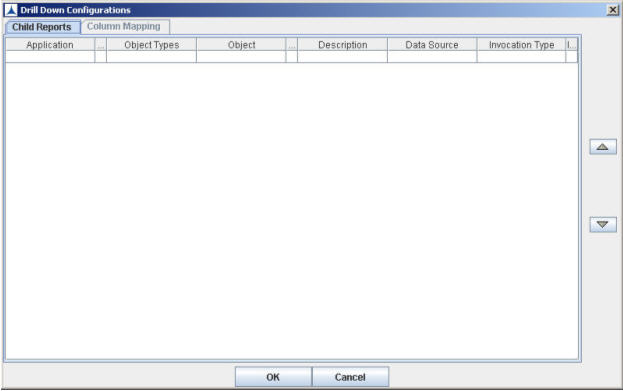
Click on any row under Drill Down. The Drill Down Configurations dialog box is displayed:

Figure 243:
The Child Reports tab
Enter the following properties under Child Reports tab:
Drilldown Configurations Dialog |
|
|---|---|
Characteristic |
Description |
Application |
Select the target application that you need to invoke from the viewer instance. Click the browse button to invoke a dialog that lists the available application. |
Object Types |
Specify the type of object that you invoke from the viewer instance. You can select any of the following object types: Instance Types: Select this object type to access other viewer instances. Node Types: Select this object type to invoke a TAB application that displays product structures. GPSCUSTOMIF: Select this object type to invoke any module within the host application. For example, you can invoke Lot Chronology in TWM from a viewer instance. |
Object |
Specify the target viewer instance, work flow type, or TAB custom application. Click the button beside this field to see a list of available target viewer instances, TAB custom frames, or work flow types. |
Description |
Enter text that describes the target application. |
Data Source |
Not Being Used |
Invocation Type |
Specify the class, which is to be loaded, pertaining to the interface of the TAB custom application. |
The Drilldown Configuration allows user to display the drilldown view based on the conditions applied. After entering details in Drilldown Configurations dialog box, click on the column beside the Invocation Type column. You see the Drilldown Condition dialog box.
Select the Property and Operator. Enter the value for property and select the condition. The Conditional Expression pane displays the property, operator, value, and condition, given for the drilldown condition.
Column Mapping
The following properties are displayed when you click on the Column Mapping tab:

Figure 244:
Source: Select the source table column from the list of values. The variables of this view class are mapped to that of destination.
Operator: Select the operator from the list of values. The list provides different operators for making drilldown conditions.
Destination Type: Select the type of destination from the list of values. The available values are Default Type and Column Type.
Destination: Select the destination table column from the list of values.
Table Alias Name: The alias name for the source table will be displayed on clicking the button beside this field.
Query Info
Click this tab to specify class properties that need to be used as criteria for querying the database.
You see the following screen:

Figure 245:
Query Info |
|
|---|---|
Characteristic |
Description |
Query Criteria |
Select this check box for properties that require to be the criteria for limiting /sorting data on the viewer instance. For example, to display all items in a factory, you can specify Factory ID as query criteria. |
Mandatory |
Select this checkbox to constrain a user to specify a value for this property. The form fetches other property values based on the value specified by the user. The user must specify a value for this property. |
Query Config |
Enter the condition as a default for querying a view. |
Query Result |
Select this checkbox for a property to set the form to display properties based on the value that a user selects for this property. In other words, this property will appear as list box on the upper part of the form. Based on the value that a user selects from this list, the form displays other property values. |
Query Default |
Enter the value as a default value for querying a view. |
Key Info
Click this tab to set business keys and system keys for the viewer instance. The business keys and system keys will be used to interface with other viewer instances or applications.
You see the following screen:

Figure 246:
Key Info |
|
|---|---|
Characteristic |
Description |
Business Key |
Select this checkbox for the properties that need to be business keys. |
System key |
Select this checkbox for the properties that need to be system keys. |
Edit Info
Click this tab to provide the edit facility for a configured view of an application.

Figure 247:
Edit Info |
|
|---|---|
Characteristic |
Description |
Edit |
Select the checkbox to provide edit facility for a property value. This facility allows the user to enter a value in the corresponding column. In Viewer Definition Pane, the O2R Instance, and O2R Data Source needs to be selected before selecting this field. |
LOV for Edit |
Select the checkbox to provide edit facility for a property value. This facility allows the user to select the required value from the list of values at the corresponding column. The Edit field needs to be selected before selecting this field. |
Mandatory for Edit |
Select the checkbox when editing of a property value is mandatory. The Edit field needs to be selected before selecting this field. |
The Edit Info tab allows the user to apply condition for Edit, Mandatory for Edit and Mandatory for Insert fields.
Click on the button beside Edit column. You see the Edit Info Dialog box.
Select the Property and Operator. Enter the value for property and select the condition. The Conditional Expression pane displays the property, operator, value, and condition, given for editing a property.
In the similar way, condition can be applied for Mandatory for Edit and Mandatory for Insert fields by clicking on the buttons beside the corresponding fields.
Insert Info
Click this tab for providing the facility to add a new record in the view of an application.

Figure 248:
Insert Info |
|
|---|---|
Characteristic |
Description |
Insert |
Select the checkbox when the data is to be inserted in database. In Viewer Definition Pane, the O2R Instance, O2R Data Source and Add Record checkbox needs to be selected before selecting this field. |
Auto Copy |
Select the checkbox for displaying the details similar to that of the last column, in a newly added row. |
LOV for Insert |
Select the checkbox for inserting a new record from list of values. The Insert field needs to be selected before selecting this field. |
Mandatory for Insert |
Select the checkbox for inserting rows with no Null values. The Insert field needs to be selected before selecting this field. |