Any project moved from Upload new Mater Plan or Ready 4 Uploading updated Master Plan state, is available in Configure and Create/Update Project. If project is moved from Upload new Master Plan state, then all the processes should be configured for creating new project in Configure and Create/Update Project state. If project is moved from Ready 4 Uploading updated Master Plan state, then newly added processes should be configured for updating existing project in Configure and Create/Update Project state.
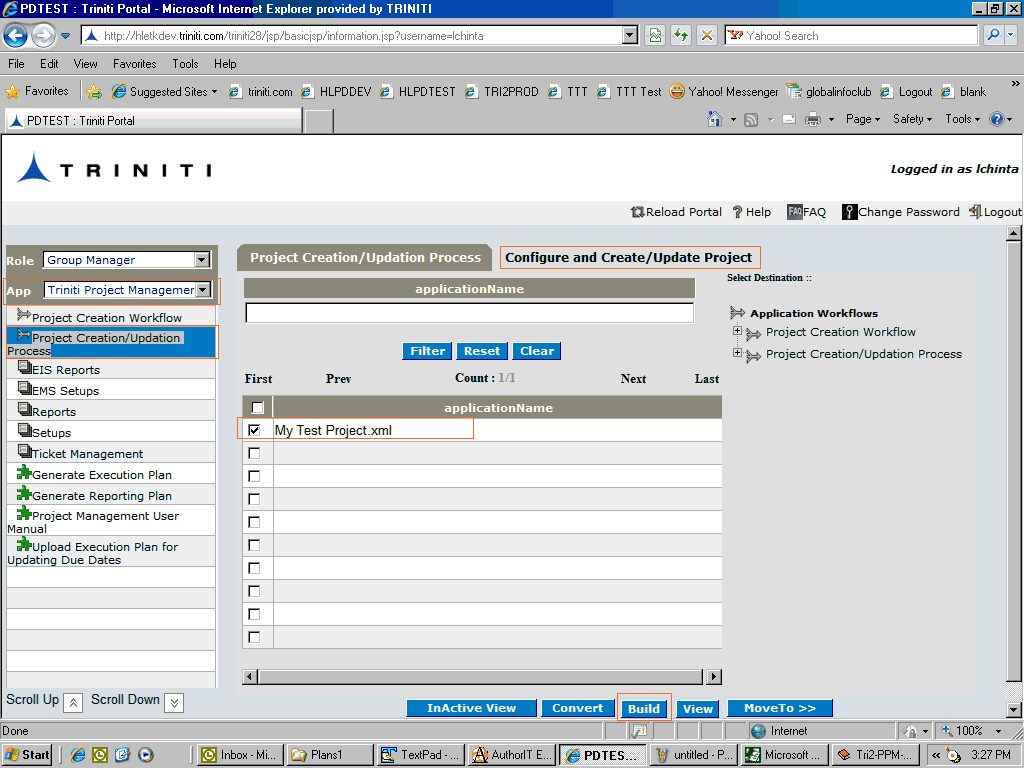
1. Select project by selecting the corresponding check box in Configure and Create/Update Project state, and then click Build button
Navigation: MPP Integration->Project Creation/Updation Process->Configure and Create/Update Project

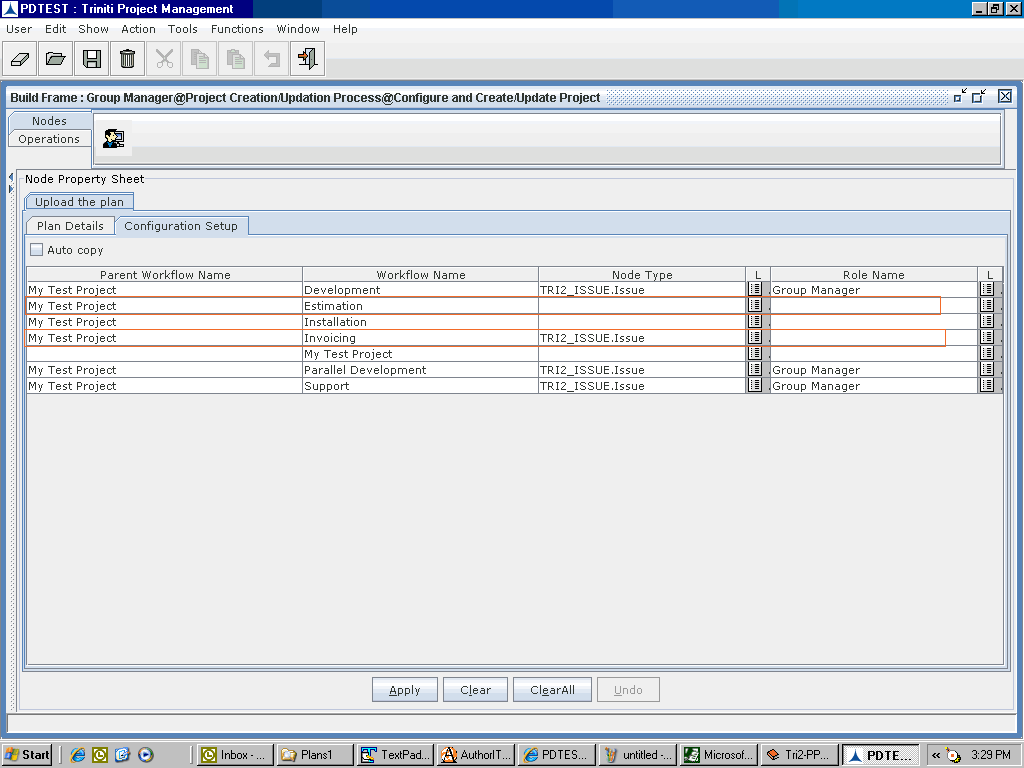
It opens a form, select Configuration Setup tab in the form, it shows newly added Processes in the Master Plan along with existing processes

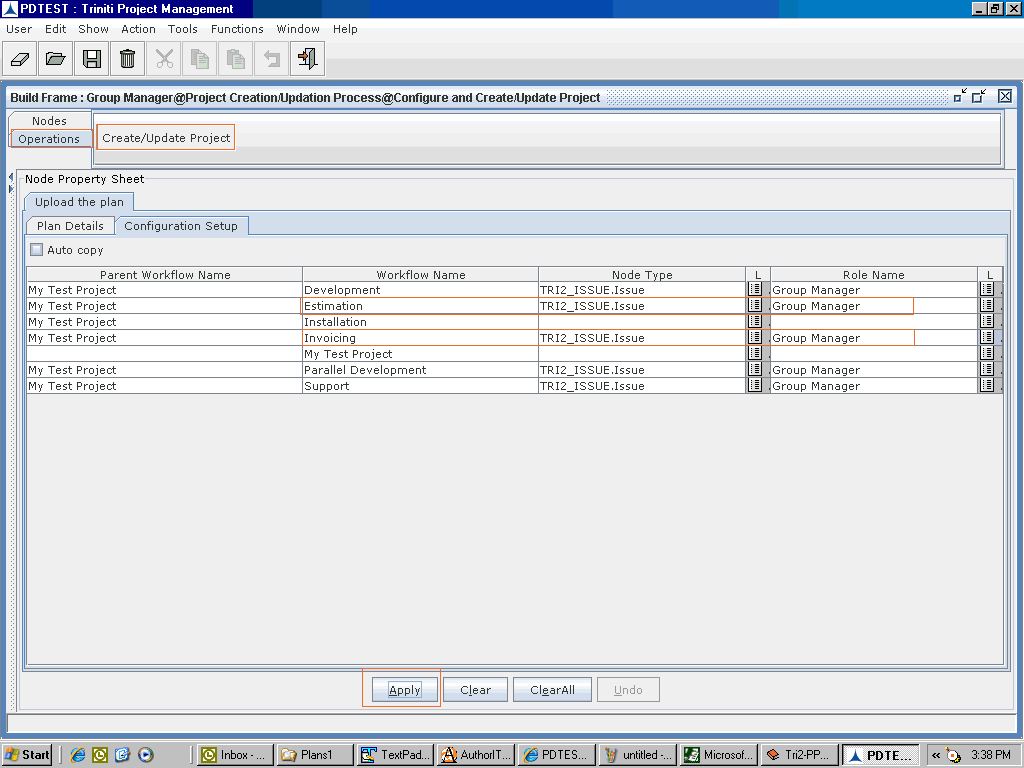
Configure Node Type and Role Name based on the requirement for the newly added processes. Node Type configuration enables process's Workflow Enability - it will be used for creating issues/tickets. Role Name configuration enables Workflow Assignment and Controlling to the specified role.
Click Apply button, select Operations tab and then Click Create/Update Project button

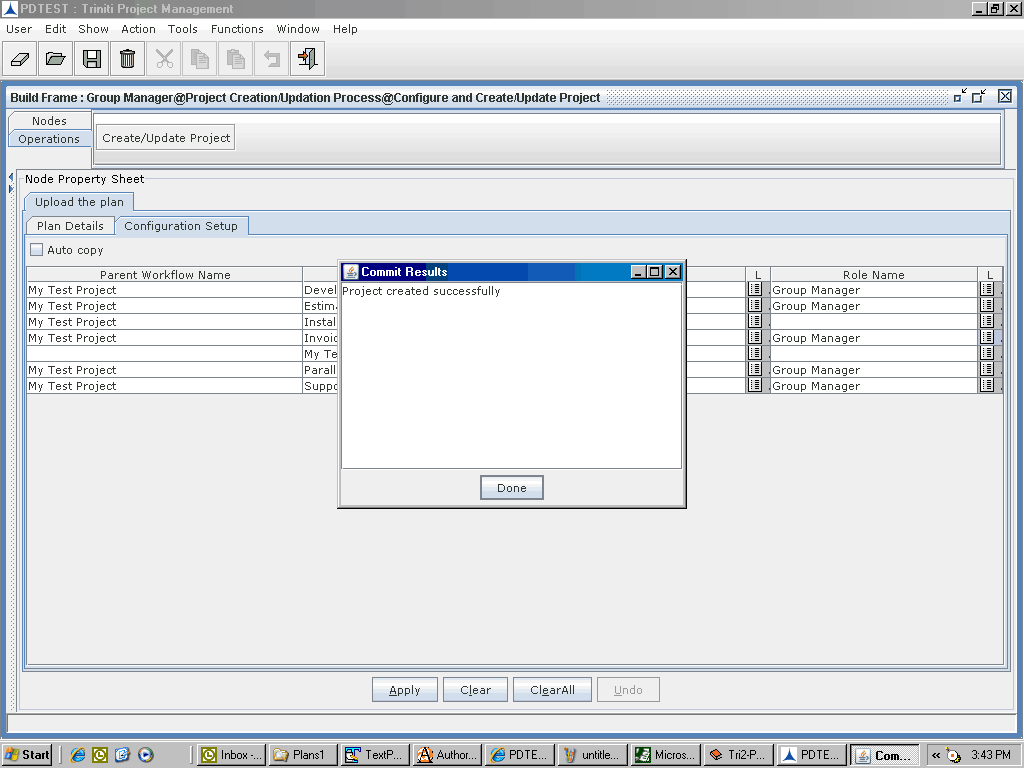
It asks confirmation, click Yes button on Confirmation dialog, it shows the following Commit Results

Click Done button on Commit Results Dialog and then close the application frame.
Then the project is moved to next state called Role/User Setups.
Read next topic Role/User Setups to continue.