Database connections in eDapter Toolkit can be added, removed or renamed by selecting Functions??ETK 5.0??Pool Configuration. In order to work on a database, we need to first configure it to get the connection. Once configured, the connection name appears in the eDapter Connection Manager under Connections as shown in Creating a Process_Figure 7.
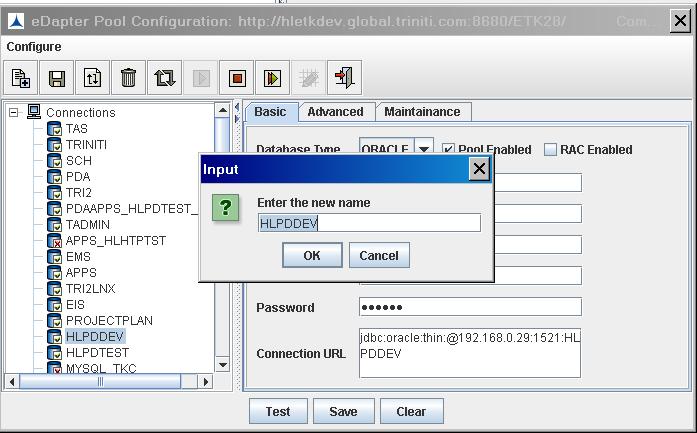
Creating a Process_Figure 5: The eDapter Pool Configuration dialog box
In the eDapter Pool Configuration dialog box, we have a single menu, namely, Configure. The menus can also be accessed using the icons in the Toolbar as explained below:
Select a connection from the Connections link on the left pane of the eDapter Pool Configuration dialog box. Three tabs, namely, Basic, Advanced, and Maintenance displayed on the right pane as shown in the Creating a Process_Figure 5.
To add a new connection, click ![]()
When clicked on new connection, a dialog box is displayed for new connection name as shown in the figure below
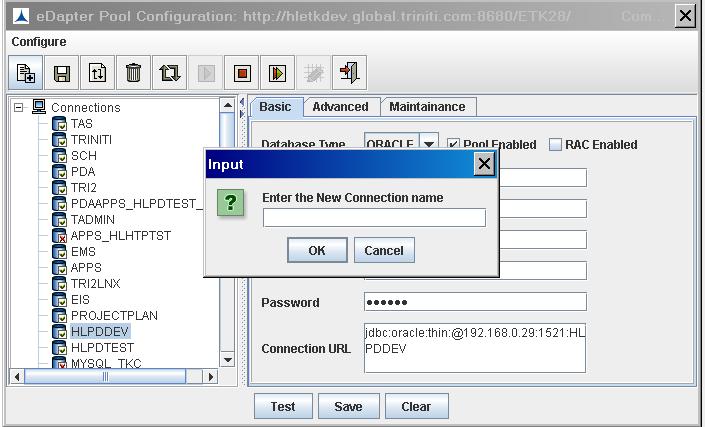
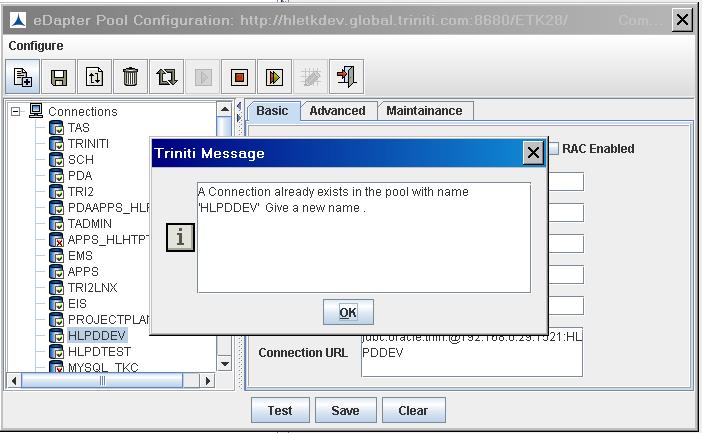
If an existing name is given, it displays a message Connection Name already exists and no connection is created.
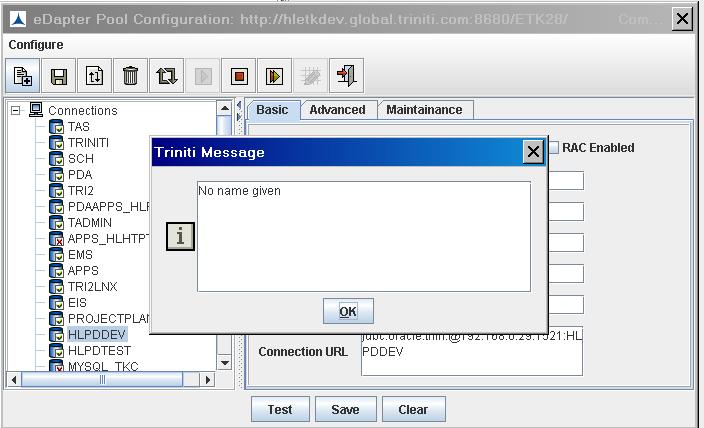
If no name is give, then No Name given message is displayed and no connection is created.
After giving new name and click ok and enter the following details under Basic tab:
Server Name/IP: Enter the server name
Port: Enter the port number
SID: Enter the database name
User: Enter the username authorized to access the database
Password: Enter the password for the username
Connection URL: The URL will be displayed automatically after entering the above details. If required they can be changed manually. It is the combination of protocol, IP address of the machine on which database instance is created, port number, and SID.
Example: Jdbc:oracle:thin:@192.168.0.13:1523:VIS5
Check Pool Enabled to display the connection name in the eDapter Connection Manager dialog box as shown in Creating a Process_Figure 7.
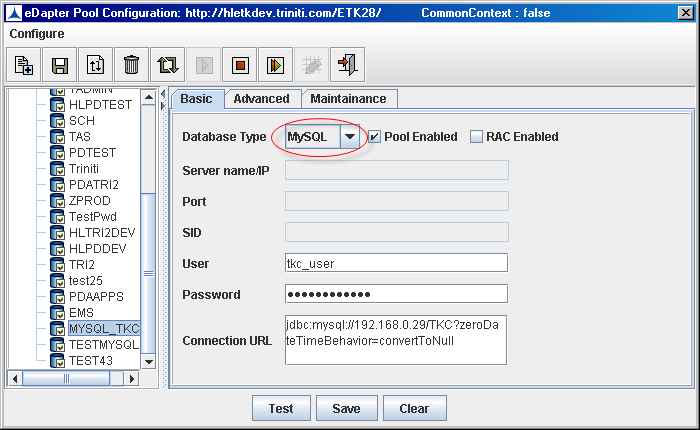
If Database Type is "MySQL", only User, Password, and Connection URL fields are enabled to fill.
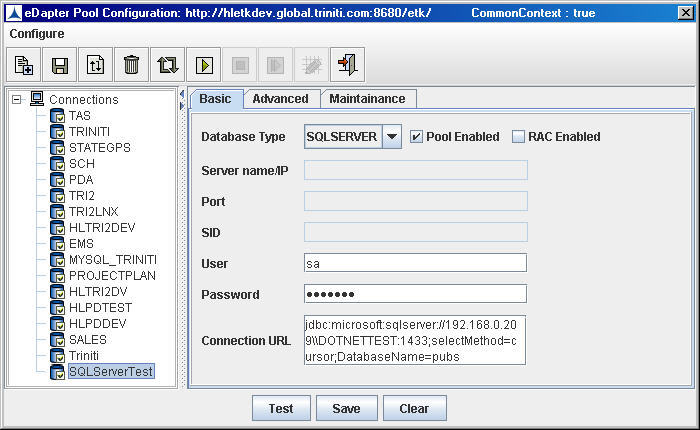
For "SQLSERVER" database type,
Example: jdbc:microsoft:sqlserver://192.168.0.209\\DOTNETTEST:1433;selectMethod=cursor;Database
Name=pubs
Click Save to save the connection details.
If a new connection is created using existing connection details with different name then the following message will be displayed.
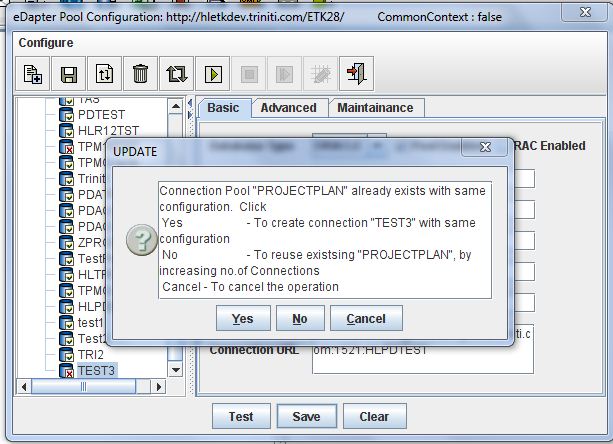
Clicking on Yes will create new connection with new name. Clicking on No will reuse existing connection by increasing number of connections.
Test : When clicked, Triniti Message dialog box is displayed stating connection is Up/Down.
Clear : When clicked empties all the text entered in the fields.
When RAC Enabled is checked, user need to provide only User, Password and Connection URL fields. Rest all fields will be disabled.
Advanced Tab : When clicked, displays the below image.
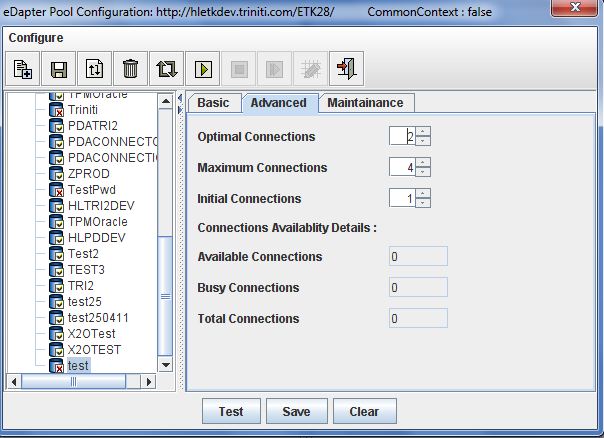
Optimal Connections : Select the Minimum number of connection.
Maximum Connections : Select the Maximum number of connection.
Initial Connections : Select the Initial number of connection.
Maintenance tab : Check the checkbox in this tab and set time period for checking idle connections and invalid connections. The idle/invalid connections to the database are disconnected automatically after completion of the time period mentioned
Note : The user can restrict editing of the pool details by entering the password in Password field. When the pool details are restricted for a database connection then the ![]() Edit icons will be enabled and the other icons are disabled except Add, Refresh, and Exit as shown below.
Edit icons will be enabled and the other icons are disabled except Add, Refresh, and Exit as shown below.
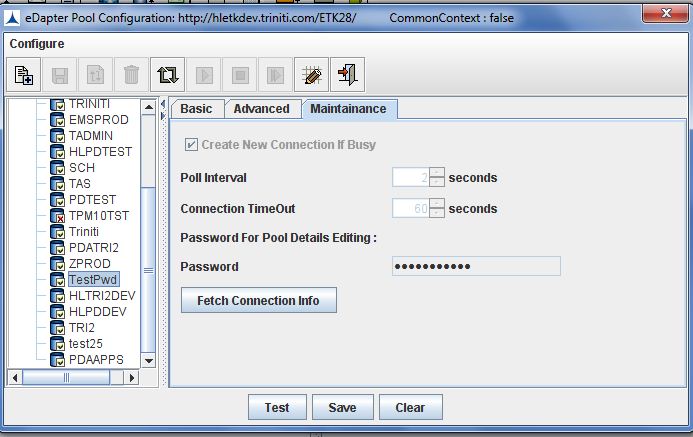
Fetch Connection Info : Will provide the details for that particular connection, as shown in the Figure below.
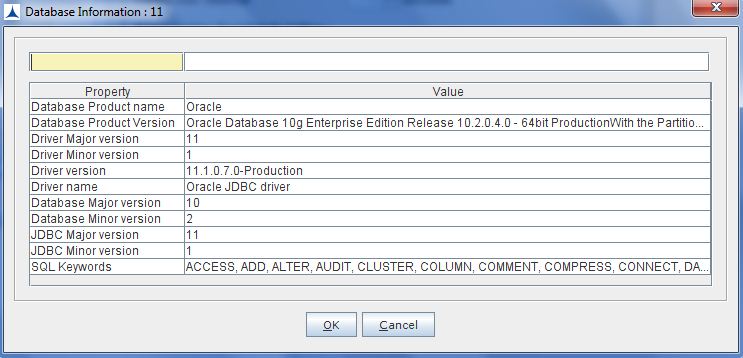
Creating a Process_Figure 6:
The following are the icons provided to configure connections:
Create New Connection:
Click ![]() to create a new connection.
to create a new connection.
Save Connection:
Click ![]() to save the connection created.
to save the connection created.
Rename Connection:
Click ![]() to rename the display name of the connection. Select the database to be renamed and then click the rename icon.
to rename the display name of the connection. Select the database to be renamed and then click the rename icon.
Delete: Click to delete the connections from the tool. Once deleted, these connections will no longer be available for use.
Refresh: Click ![]() to refresh the connections
to refresh the connections
Start: Click ![]() to start connection to the database
to start connection to the database
Stop: Click ![]() to stop the connection
to stop the connection
Restart: Click ![]() to restart the connection to the database
to restart the connection to the database
Edit: This icon is enabled for a connection, only when the pool details are restricted. Click ![]()
to enter password for enabling the editable fields and functional tools that are restricted.
Exit: Click ![]() to exit eDapter Pool Configuration.
to exit eDapter Pool Configuration.