Instances can be configured and then run. Configuration details for an instance are available under Config tab, and Log tab as discussed below in this section. If the log configuration details are updated when the instance is running, these changes are reflected only when the instance is run for the next time. All the individual log configuration preferences are read-only when the instance is started.
To configure an instance:
Select an instance on the left pane. Two tabs, namely, Config and Log are displayed on the right pane as shown below:
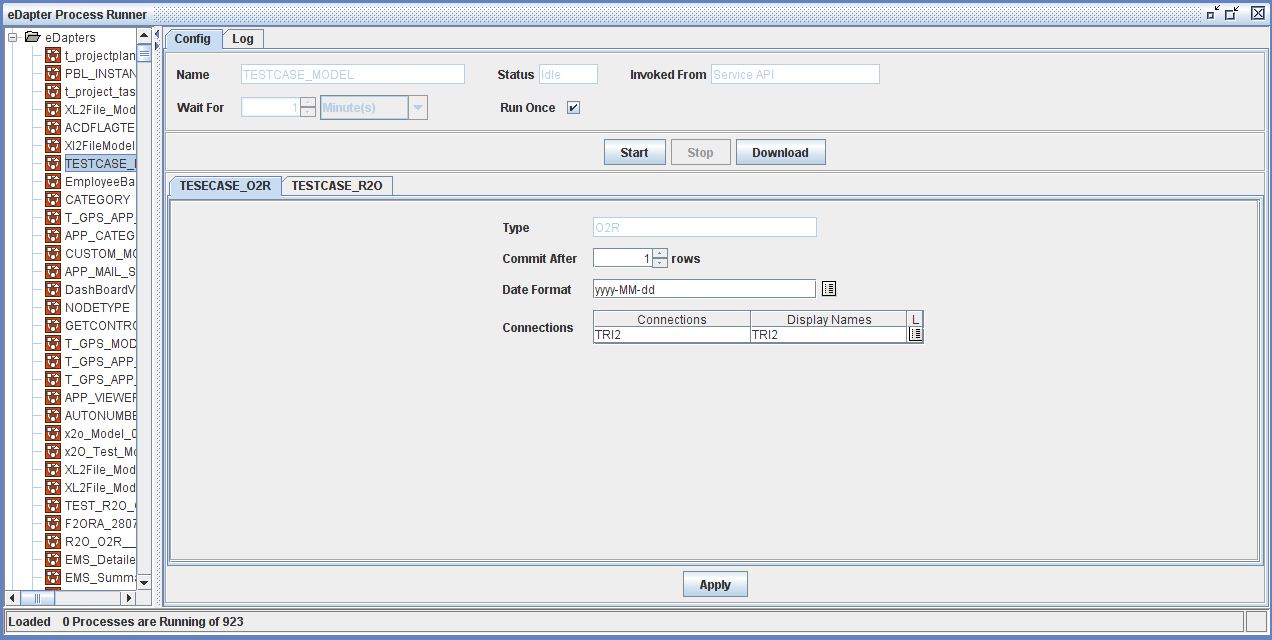
Generate Code & Running a Modeled Process_ Figure 11:
Config Tab
The Config tab consists of the following:
Instance
The instance frame consists of Name, Status, Wait For and Run Once. Here, a process can be configured to run once or wait for a certain period of time.

Generate Code & Running a Modeled Process_ Figure 12:


Operations Available
The operations available to schedule the process are:
Nodes Configuration
The fields displayed in the Nodes Configuration frame depend on the node types in the process. For an instance involving R2O, the Nodes Configuration frame would be as shown below:
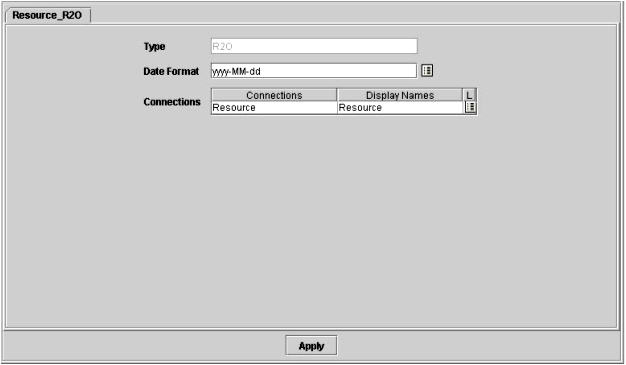
Generate Code & Running a Modeled Process_ Figure 13:
R2O Node Configuration
The following are the fields available in the R2O node tab:
Fields |
Description |
Type |
The type of node used in the process to transfer data. |
Date Format |
Select the format available in the list or test the new date format created |
Connections |
Connections � Name of the database connection |
Display Names � The display name of the database |
O2R Node Configuration
The following are the fields available in the O2R node tab:
Fields |
Description |
Type |
The type of node used in the process to transfer data |
Commit After |
The number of rows for which the data should commit |
Date Format |
Select the format available in the list or test the new date format created |
Connections |
Connections � Name of the database connection |
Display Names � The display name of the database |
F2ORA Node Configuration
For an instance involving F2ORA node, the Nodes Configuration frame would be as shown below:
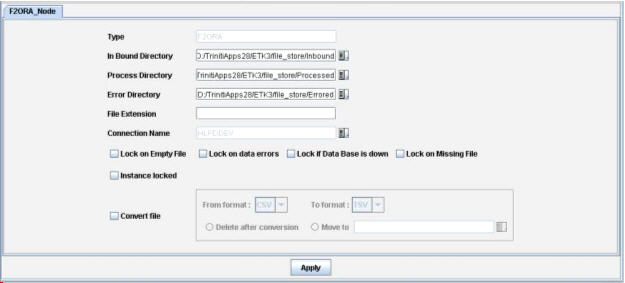
Generate Code & Running a Modeled Process_ Figure 14:
The following are the fields available in the F2ORA node tab:
Fields |
Description |
Type |
The type of node used in the process to transfer data |
In Bound Directory |
The directory from which files can be extracted |
Process Directory |
Files extracted from In Bound Directory are moved to Process Directory when no error occurs while extracting |
Error Directory |
Files extracted from In Bound Directory are moved to Error Directory when an error occurs while extracting |
File Extension |
Extension of the file |
Connection Name |
Select the connection name of database from the list of values |
R2F Node Configuration
For an instance involving R2F node, the Nodes Configuration frame would be as shown below:
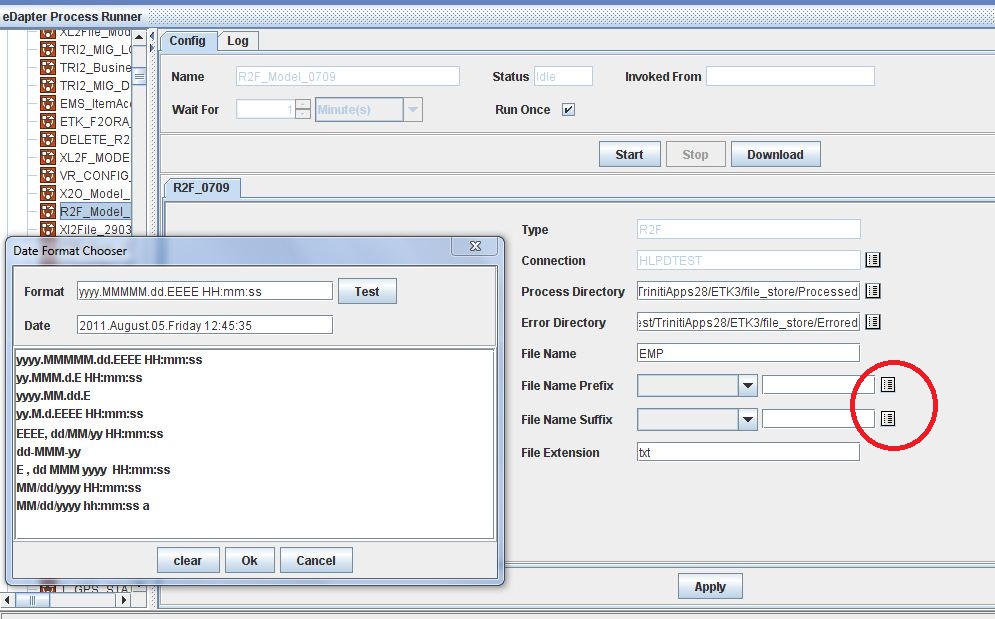
Generate Code & Running a Modeled Process_ Figure 15:
The following are the fields available in the R2F node tab:
Fields |
Description |
Type |
The type of node used in the process to transfer data |
Connection |
Name of the database connection |
Process Directory |
Files extracted are moved to Process Directory when no error occurs while extracting |
Error Directory |
Files extracted are moved to Error Directory when an error occurs while extracting |
File Name |
Name of the file |
File Name Prefix |
Select the prefix for the file name. User can also select the tim stamp format by clicking on LOV button as shown in the figure. |
File Name Suffix |
Select the suffix for the file name. User can also select the tim stamp format by clicking on LOV button as shown in the figure. |
File Extension |
Enter the extension of the file |
Sequencer Node Configuration
For an instance involving Sequencer node, the Nodes Configuration frame would be as shown below:
Generate Code & Running a Modeled Process_ Figure 16:
Click on the '+ button' and select the instance for which Sequencer node configuration is to be done. Select the Ignore On Error checkbox corresponding to the instances for which the error should be ignored, if occurs while running a Sequencer, in order to continue the process of running the successive instances in a sequencer.
Note: When a sequencer instance is run and any of the instances in the sequence is failed to run then the successive instances in a sequence cannot run further and the sequencer instance will show an error and will also stop running.
When a scheduled sequencer instance is run and any of the instances in the sequence is failed to run then the successive instances in a sequence cannot run further and the sequencer instance will not only stop running in the current time interval but also in the successive time periods.
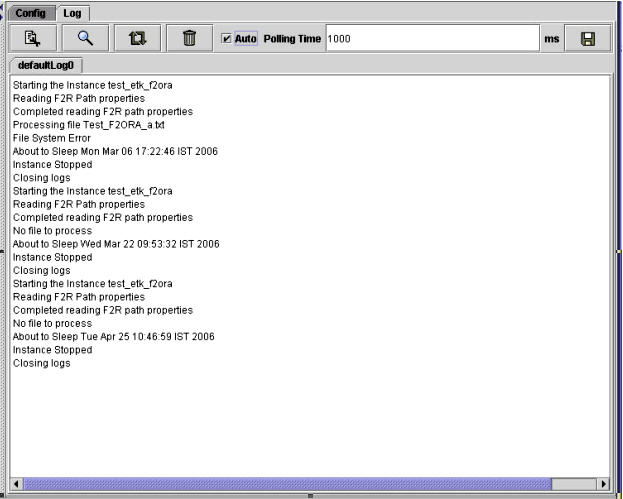
Log Tab
The Log tab is used to display the log configuration when a process is run as shown below. When an instance is run, the log details are displayed under tab, namely, defaultLog0.
Generate Code & Running a Modeled Process_ Figure 17:
When an instance is run in Service API cases, log details are displayed under the tab, namely, servicemessages0.
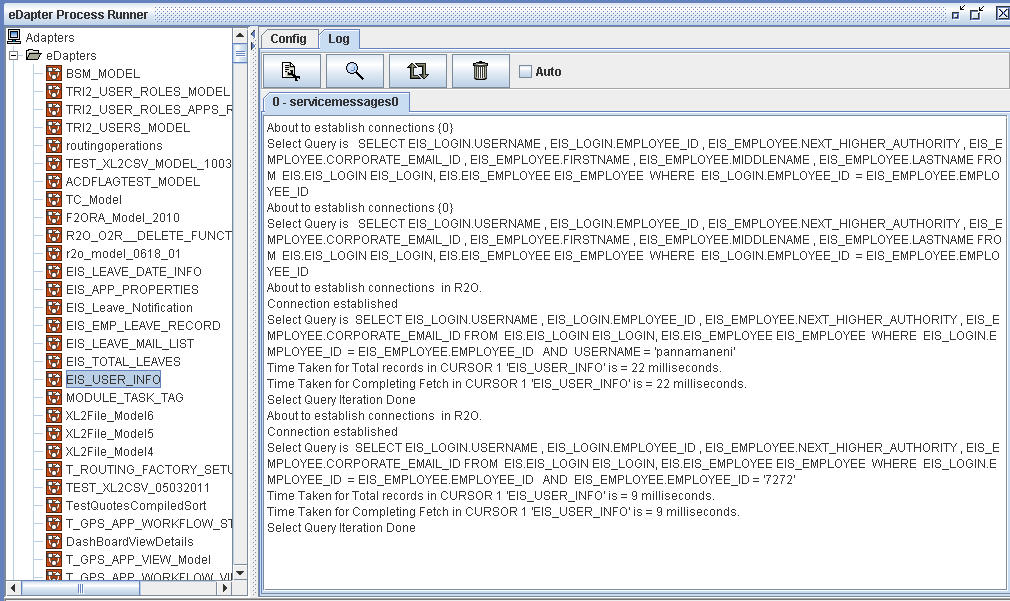
Generate Code & Running a Modeled Process_ Figure 18:
The Log tab consists of a set of icons as explained below:
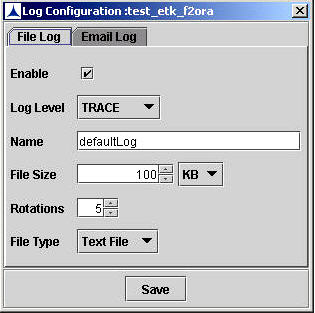
Generate Code & Running a Modeled Process_ Figure 19:
Enter the following details under File Log tab:
Severe- message level that indicates a serious failure
Trace- message level that indicates highly detailed tracing message
Info- message level that provides informational messages
Debugging- message level that provides tracing information
Warning- message level indicating a potential problem
Enter the following fields under Email Log tab:
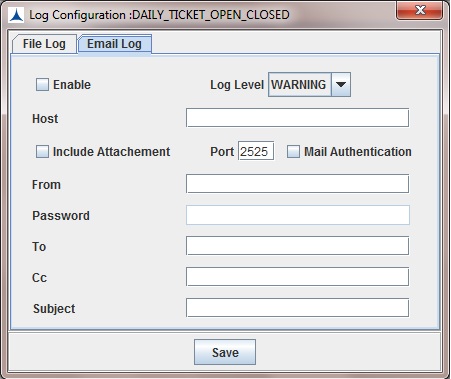
Generate Code & Running a Modeled Process_ Figure 20:
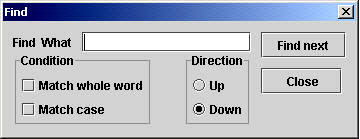
Generate Code & Running a Modeled Process_ Figure 21:
![]()
Generate Code & Running a Modeled Process_ Figure 22: