For any condition in SQL we have in general a Linking Condition, Left Column Name, Condition Operator, Virtual Columns, Right Column Name and a Right Column Default Value.

Nodes Configuration_Figure 11: Adding Conditions
Linking Condition
This consists of various options like: Where, And, Or, Order By Asc, Order By Desc, Group By and Having. Double-click on any condition to select it.
Left Column Name
The column names of the tables selected are displayed. Double-click on any column to select it.
Condition Operator
On selecting Condition Operator, a list of operators is displayed which can be used in SQL like, =, !=, >, <, Like, Between etc. Double-click on any operator to select it.
For the right column values, select from any of the following options:
Virtual Columns
This displays a list of virtual columns. It contains all the columns from the previous selects/cursors groups. Double-click on any column to select it.
Right Column Name
The column names of the tables selected in the current select or cursor are displayed.
Double-click on any column to select it.
Right Column Default Value
This is used to enter static values. Type the value or expression which can be built from Expression Builder.
The conditions created can be modified and deleted with the help of related buttons provided (Conditions frame as shown in figure below). Click Add to add a new condition.
Once the table and columns are selected, add conditions for selection of the data. To add a conditional value, click Right Column Default Value. An editable field highlighted in yellow color as shown below appears:
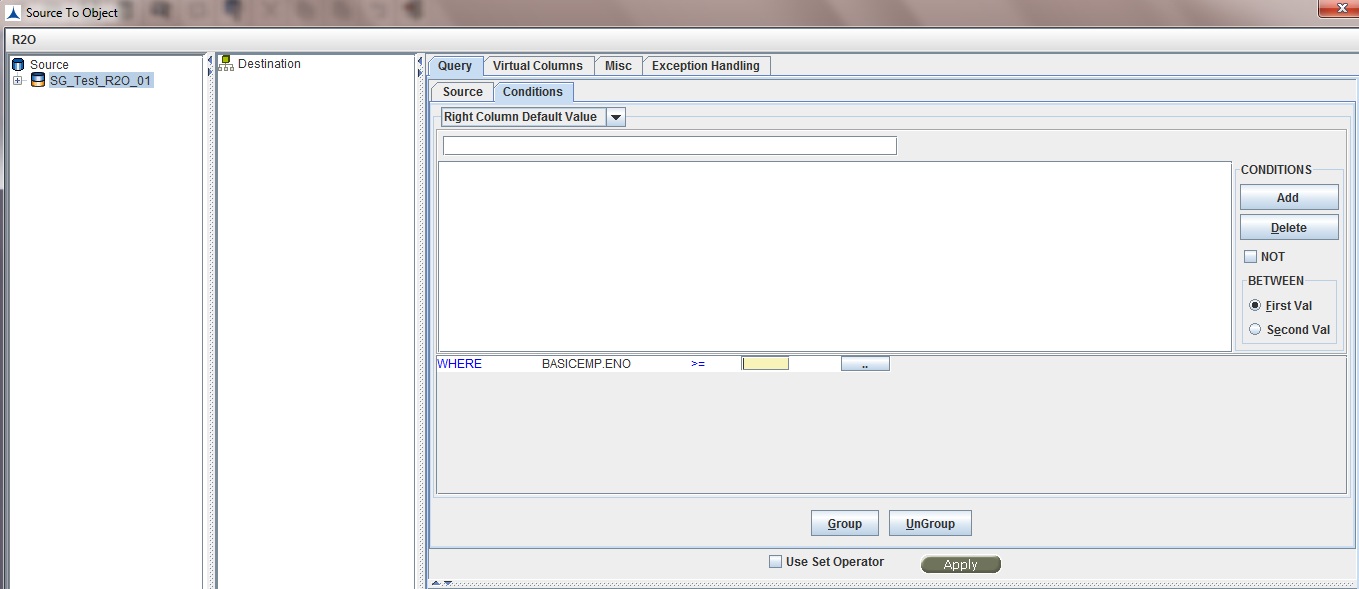
Nodes Configuration_Figure 12:
Note: Press the [Enter] key after typing a value in the editable field to commit the value, else the value is not applied to the field in the linking condition.
Adding Multiple Columns for Group By and Order By Conditions
The following are the steps involved to add multiple columns for Group By and Order By clauses:
Step 1: Select GROUP BY / ORDER BY clause from the Linking Condition options by double-clicking on it.
Step 2: Select the columns one needs to group/order by, which will be the first column for this clause.
Step 3: Click on the Add to add a row for entering a new condition.
Repeat Step 1 and Step 2 and enter as many numbers of columns the table has.
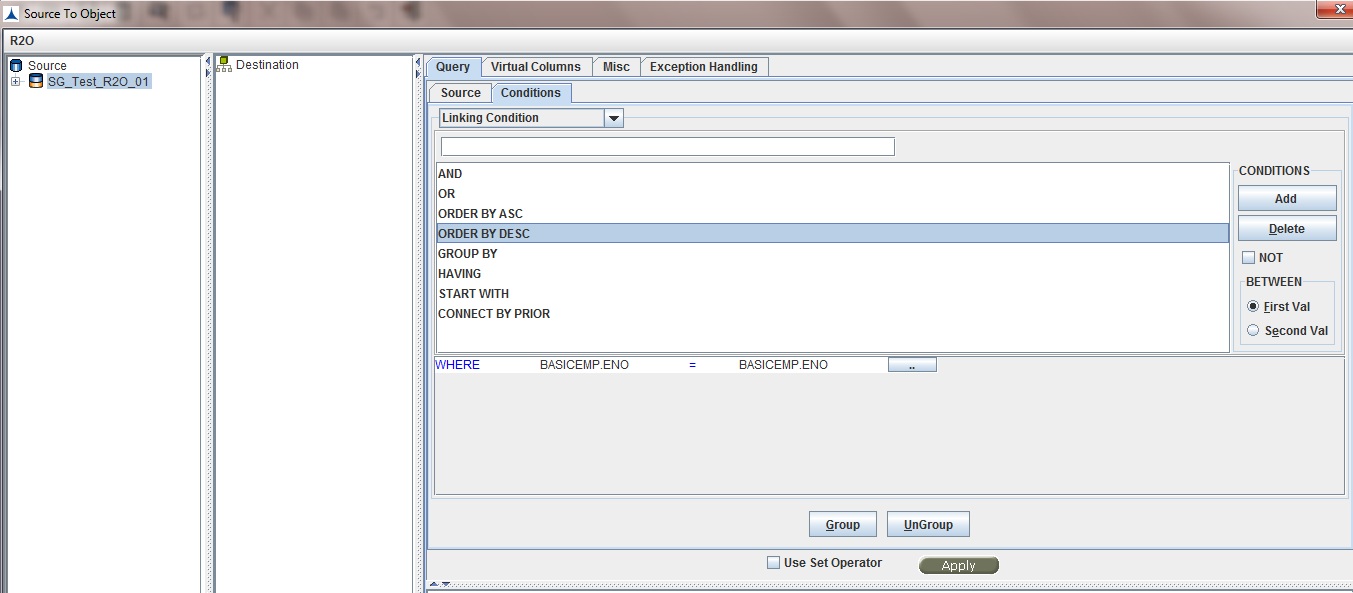
Nodes Configuration_Figure 13: Group/Order By
Adding Conditions Using Between Operator
To add conditions using Between operator:
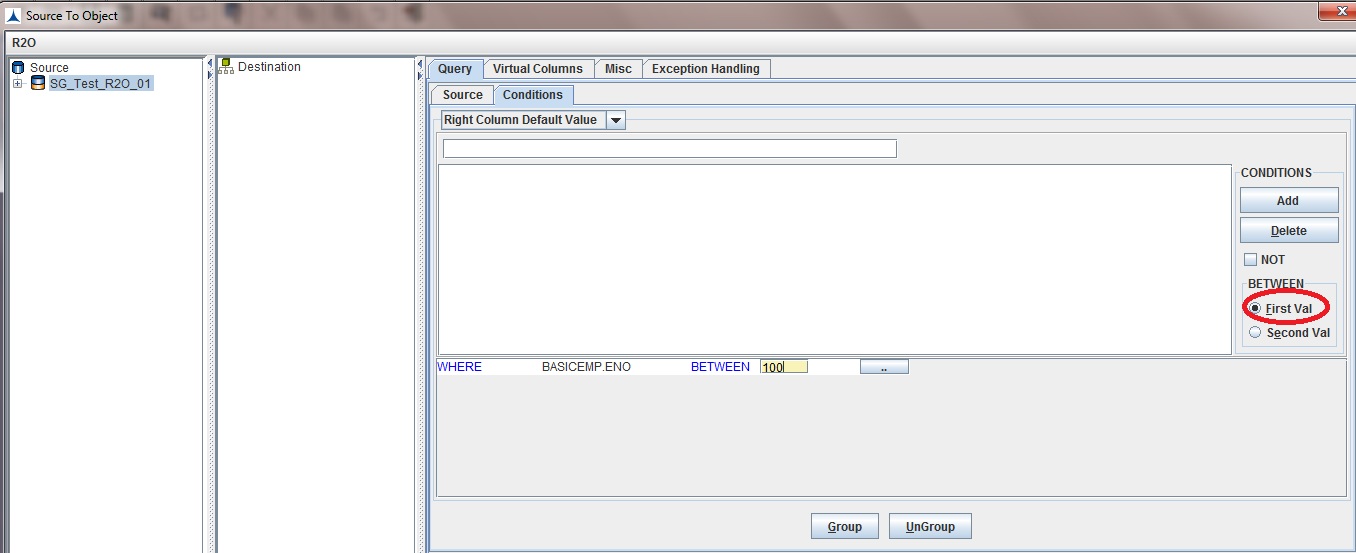
Nodes Configuration_Figure 14:
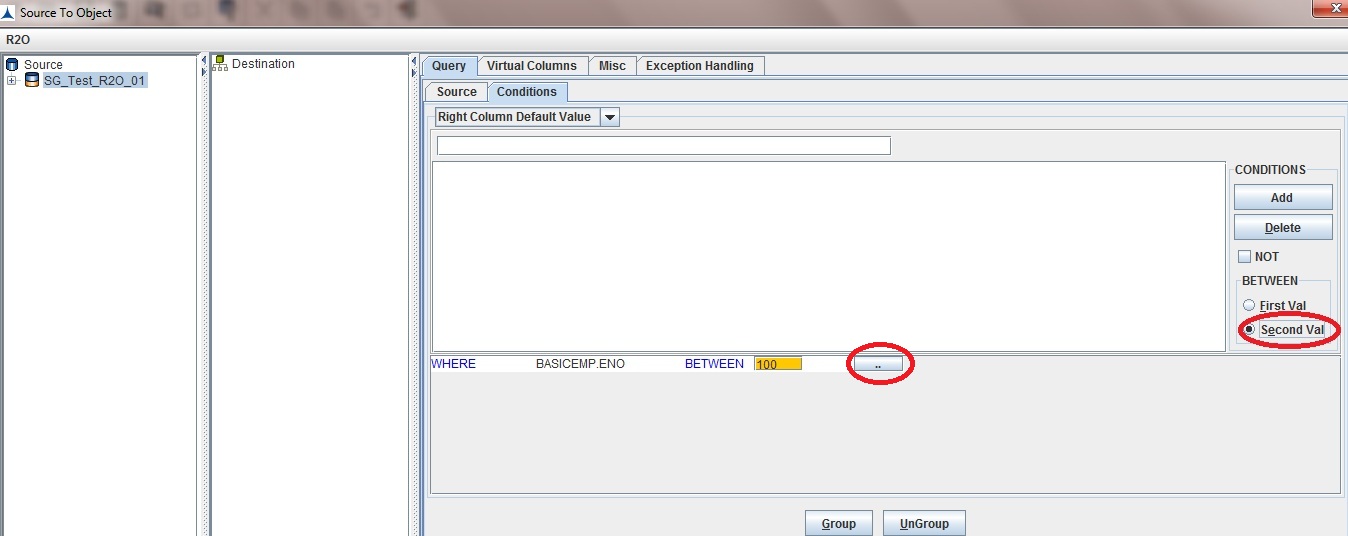
Nodes Configuration_Figure 15:
The Expression Builder dialog box is displayed as shown below:
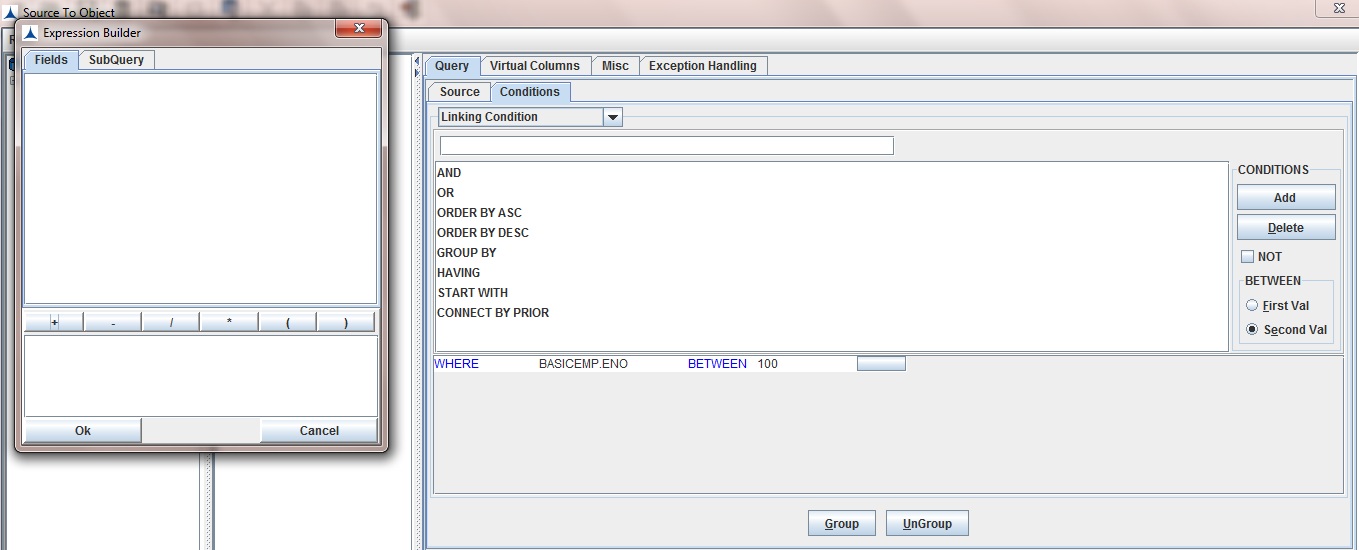
Nodes Configuration_Figure 16:
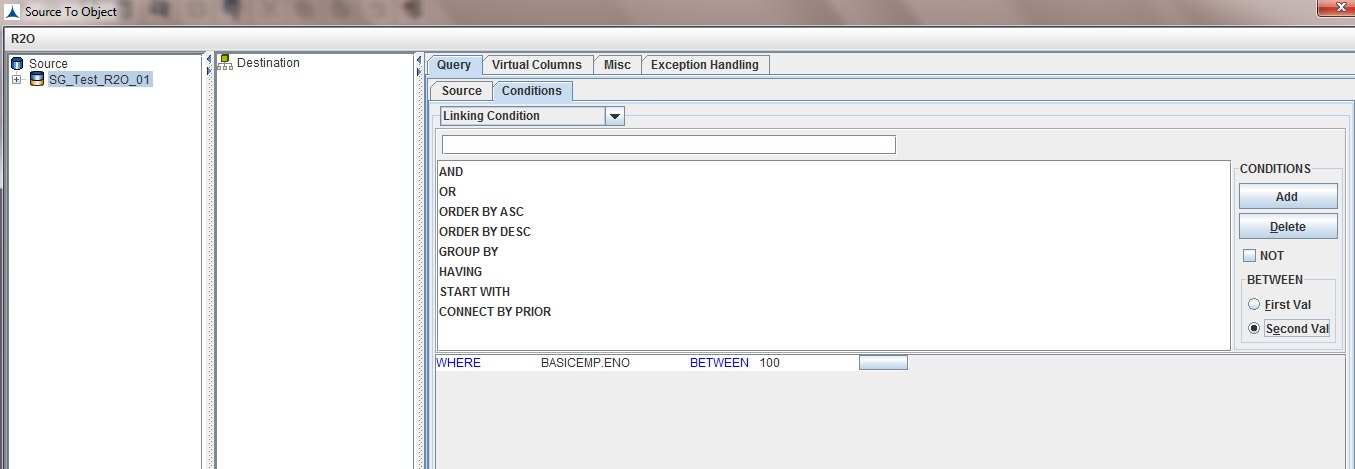
Nodes Configuration_Figure 17:
Expression Builder
Expression Builder can be accessed by clicking the button as shown in Nodes Configuration_Figure 15. The Expression Builder dialog box is displayed (refer to Nodes Configuration_Figure 16) with two tabs-Fields and SubQuery. Enter a static value or a column name in the Fields tab page. In order to create a sub-query in the SubQuery tab page, follow the same process of adding tables, selecting columns, adding conditions etc. With the help of Expression Builder one can enter values to the conditions.
Group/Ungroup
Once conditions are created, grouping/ungrouping of these conditions is possible with help of Group and Ungroup buttons as shown in Nodes Configuration_Figure 18. The syntax of grouping is same as that of SQL grouping.
A single row of condition cannot be grouped; else an error message is displayed saying "Select more than one row". Select the number of rows that need to be grouped and click on the Group button.
Once grouped, no row can be deleted that is part of a group. To delete a grouped row, ungroup it first by using Ungroup button and then delete it.
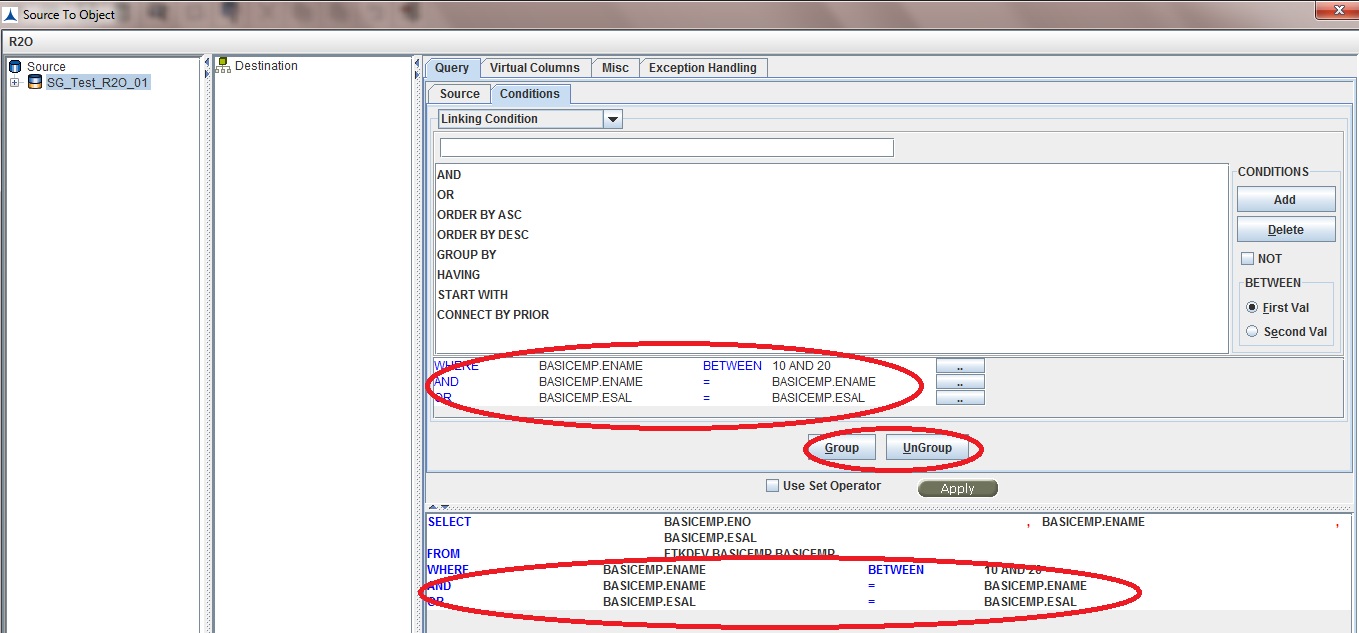
Nodes Configuration_Figure 18: Group/Ungroup
After selecting tables, columns and adding conditions for fetching the data, the next step is to create the final query which is done by clicking Apply as shown in Nodes Configuration_Figure 19. Click Apply to create the SELECT query. The entire query appears at the bottom of the screen.
Note: If no name is given to the select or cursor at this point of time, on clicking Apply the system prompts to give a name to the select or cursor.
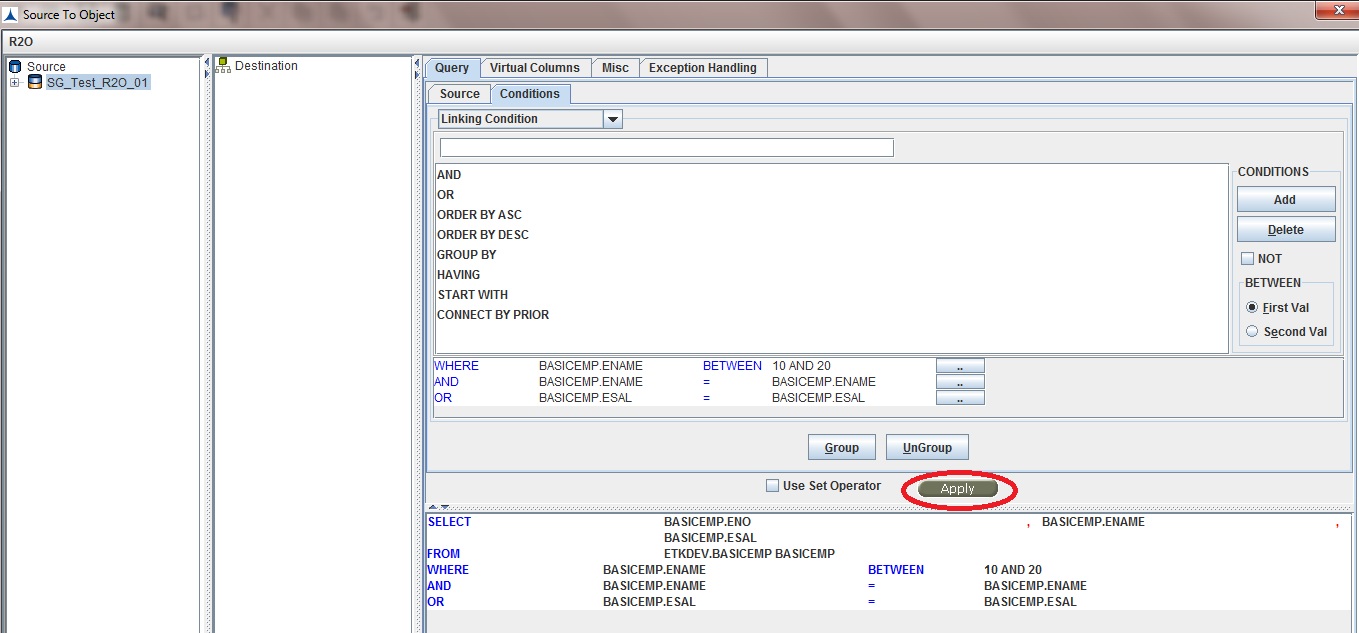
Nodes Configuration_Figure 19: Applying the query
Set Operators
We can use set operators for the SELECT query. The set operators are as follows:
In order to use the set operators, select Use Set Operator checkbox provided beside the Apply button as shown in Nodes Configuration_Figure 19. This displays an Add button (as shown in Nodes Configuration_Figure 20), a Delete icon and a Set Operator list box to select a set operator.

Nodes Configuration_Figure 20: Set Operators
Click Add and select the set operator from the list provided. Select a table from Table Selection Dialog box. Now select the columns from the table. Click Apply again to rebuild the query along with the set operator.
Editing Column Name
In the Source tab, the column names in Available Columns can be changed. To change a column name, double-click on the column name. A dialog box is displayed to enter the Virtual Column Name as shown in the figure below.

Nodes Configuration_Figure 21: Editing Columns
This can also be used for performing SQL functions like substr, decode, etc.