Previous Topic

Next Topic

Book Contents

Book Index

Creating an Application

To create an application:

  1. Click on the Workflow Enabled/Workflow Disabled node in the nodes area and drop it on the work area. You see the following screen:

    Application Workflow Enabled Node

    Figure 27:

  2. Enter properties for the new application. Refer to the Properties of Application Workflow Enabled Node or Properties of Application Workflow Disabled Node topic for description of application properties.

Now you define workflow types for the application if the new application is required to be workflow enabled. An application can have one or more workflow types.

To define a workflow type for the application:
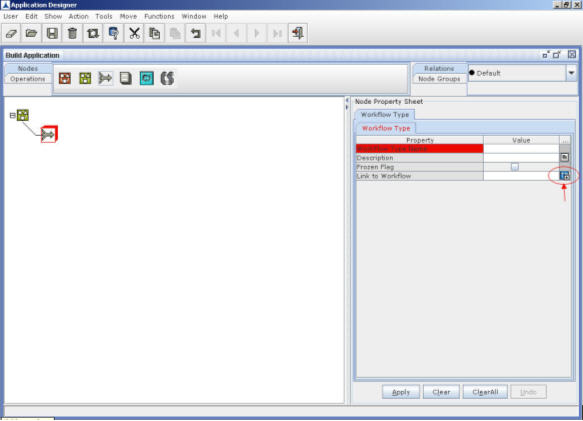
  1. Click the WorkFlow Type node and drop it on the work area.
  2. Connect the Workflow Type node with the Workflow Enabled node by selecting workflow type node and dragging the cursor from Workflow Type node to the Workflow Enabled node on the work area. When you connect the nodes, the screen appears as shown below:

    Application Designer-Workflow Type

    Figure 28:

  3. Enter values for the properties of the newly added Workflow Type node.

    You can link multiple workflow type to an application.

    After linking the workflow type node to an application node, you need to model/design the workflow in the Workflow Designer application.

    To launch Workflow Designer from Application Builder, click the application link button highlighted in red circle beside the Link to Workflow field on the Workflow Type node property sheet as shown in Figure 13.

    For configuring the 'QueryTemplate' in Workflow leval (Like Application Designer we have a QueryTemplate, similar to Workflow leval also), click the 'QueryTemplate' link button highlighted in red circle beside the QueryTemplate field that is shown in the 'Node Property Sheet' as shown bellow Figure 29
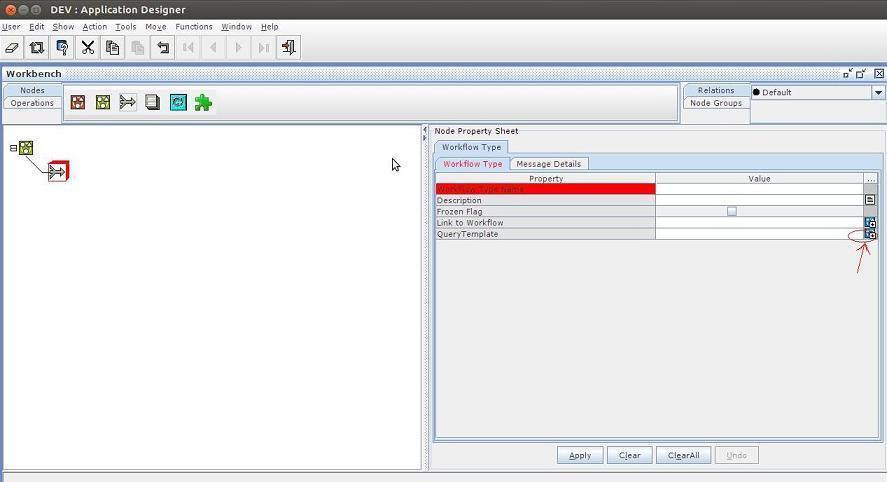
    Configure Query template for Workflow leval also

    Figure 29:

    For more information on how to design/model a workflow, refer to the section Workflow Designer.

  4. Click Apply and then click Operations???????Commit.

In This Section

Different types of Applications creation

Properties of Application Workflow Enabled Node

Properties of Application_Workflow_Disabled Node

Workflow Type Node Properties

See Also

Application Designer

Overview

Links on Portal Page

Accessing the Application Designer

About User Interface

Creating a Custom Application

Adding a Custom Set

Saving a Model

Opening a Model

Downloading a Model

Uploading a Model

To Move Single Model from one category to another

To Move Selected Models From one category to another

To Move All Models From one Category to Another

Adding a Viewer Instance Set and a Viewer Instance

Application Details

Application Setups

Other Facilities in Application Designer