Previous Topic

Next Topic

Book Contents

Book Index

Configuring R2F

In this section, we discuss how to map the Source to File (also known as R2F). In R2F, source is a table and destination is a file.

The following are steps to be followed to configure the R2F node:
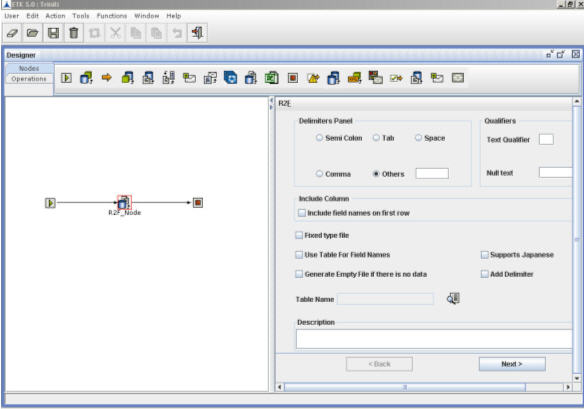
  1. Click the R2F node in the work area. The R2F frame is displayed on the right pane as shown below:

    Nodes Configuration_Figure 64: Configuring R2F node.

  2. There are two ways to map the data into a file, User-defined Configuration and Fixed Type File Configuration.

    User-defined Configuration: Users can select a delimiter or specify a character which acts as the separator in the file.

    Select the delimiter from the Delimiters Panel. The options are:

    Semi Colon

    Tab

    Space

    Comma

    Others - Type a character to act as a delimiter.

    Select a qualifier from the Qualifiers panel. This is optional and is an advanced option.

    Text Qualifier - Specify a character like double quote (") or single quote (') to act as a text qualifier.

    Null Text - Specify NULL in this field.

    Check the checkbox in Include Column panel to include field names on the first row.

    Add Delimiter: Select this checkbox when a comma needs to be included after the last column of every row.

    Supports Japanese: Select this checkbox when the Japanese data is to be read from database tables.

    Fixed Type File Configuration: Users can specify the position of the fields in the file as shown in Nodes Configuration_Figure 65.

    Check the Fixed type file checkbox. The Delimiters Panel, Qualifiers and Include Column frames are disabled.

  3. Click adjacent to the field Table Name, to display the Table Selection Dialog. Select a table from the dialog box displayed.
  4. Enter a brief description in the Description field.
  5. Click Next.

    The R2F pane is displayed based on the configuration as explained above. When you check Fixed type file checkbox, the following screen is displayed.
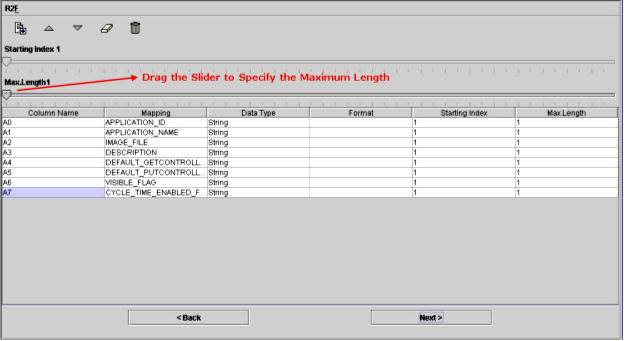
    Nodes Configuration_Figure 65:
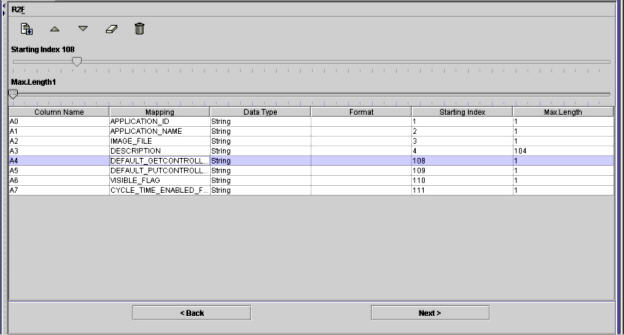
  6. Starting Index specifies the starting point of the text in the file. Starting Index for the first field name starts with 1. The maximum length can be specified either by entering the value in the Max.Length column or by dragging the slider as shown above. Starting Index for the successive field names depends on the Max.Length of the previous field name as shown below:

    Nodes Configuration_Figure 66:

  7. When you clear Fixed type file checkbox, the following screen is displayed:

    Nodes Configuration_Figure 67:

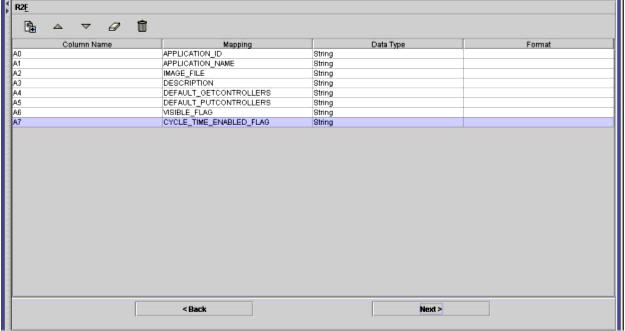
  8. Check Use Table For Field Names checkbox to display field names in the Column Name column as shown in figure below. Clearing the checkbox would display A0, A1, A2 and so on in the Column Name column as shown in the above figure.
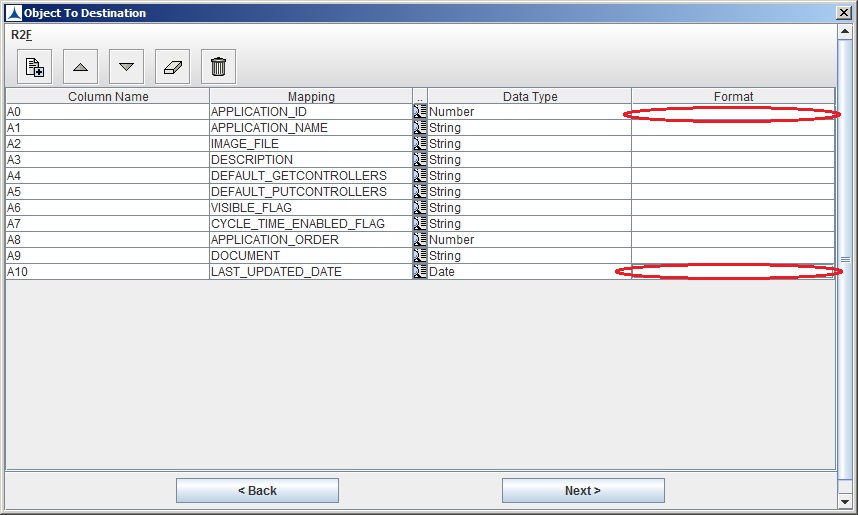
  9. User can set the format for columns of type Number and Date, by clicking of Format column as shown above. Then the respective dialogs will be displayed as below, to set the format. These dialogs contains some sample formats, user can set his own also.

    Nodes Configuration_Figure 68:

  10. The column names can be entered manually. Every row in the Mapping column displays a drop-down with all the fields of the selected table. The Data Type and Format can be selected from the drop-down similarly.
  11. Click Fig-5.5-1 to append new rows to the table.
  12. Click to move the selected row upwards.
  13. Click to move the selected row downwards.
  14. Click to clear the entire table.
  15. Click to delete the selected row.
  16. Click Back to navigate to the previous screen.
  17. Click Next.

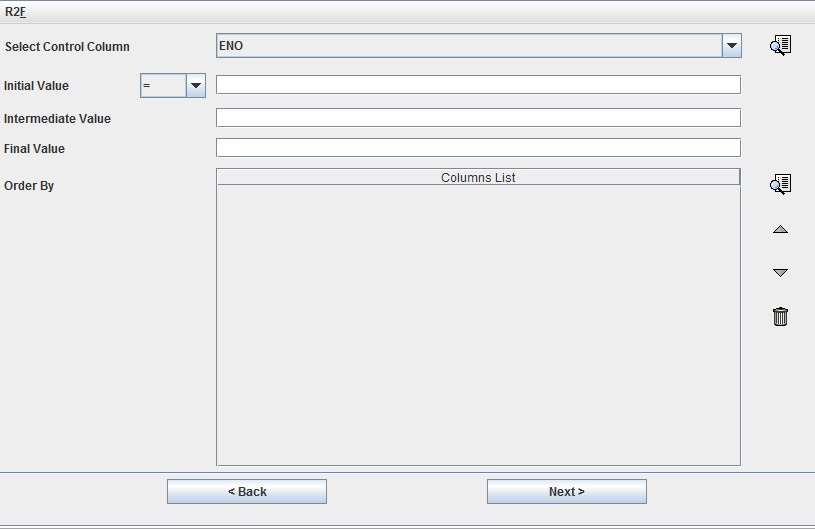
    The following screen is displayed:

    Nodes Configuration_Figure 69:
  18. Click Back to navigate to the previous screen.
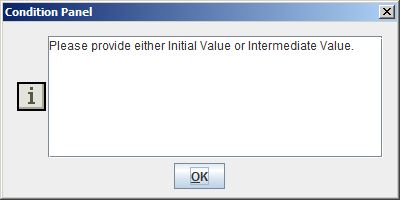
  19. If you click next without giving proper values, it will show a message as follows. Enter proper values
  20. Select a field name from the drop-down to act as a control column. Alternatively, click to display a list of all the field names from the table selected and select from the list displayed.
  21. Enter a value in the Initial Value field which acts as a criterion. If D_OBJ# is equal to the initial value, the records with that value need to be copied into the R2F file.
  22. If D_OBJ# is equal to Intermediate Value, the records having intermediate value are in the process of coping.
  23. If D_OBJ# is equal to Final Value, the records with final value are copied into the R2F file.
  24. Either ' Initial Value' or 'Intermediate Value' field can be empty, but both the fields should not be left empty.
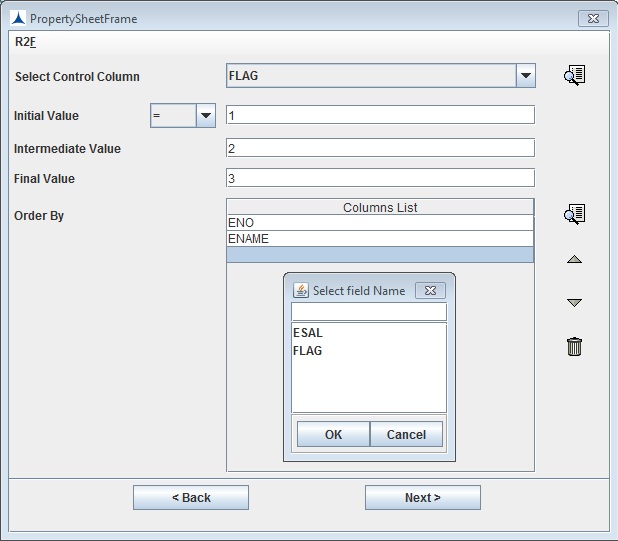
  25. Select a column for sorting in the Order By field. Click to display a list of all the fields from the table selected. Select a field from the list displayed. Multiple columns can be added to the list as shown below:

    Nodes Configuration_Figure 70:

    Note: Order By is an optional field. The columns are sorted depending on the column selected in the Order By field.
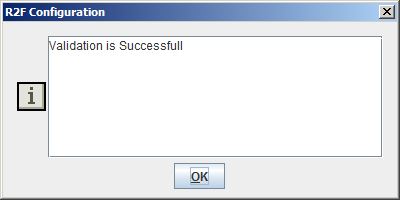
  26. Click Apply. A message saying "Validation is Successfull" is displayed.

    Nodes Configuration_Figure 71:

Depending on the values given for Initial Value, Intermediate Value and Final Value fields, the respective queries will be created and displayed as shown in the figure given below.
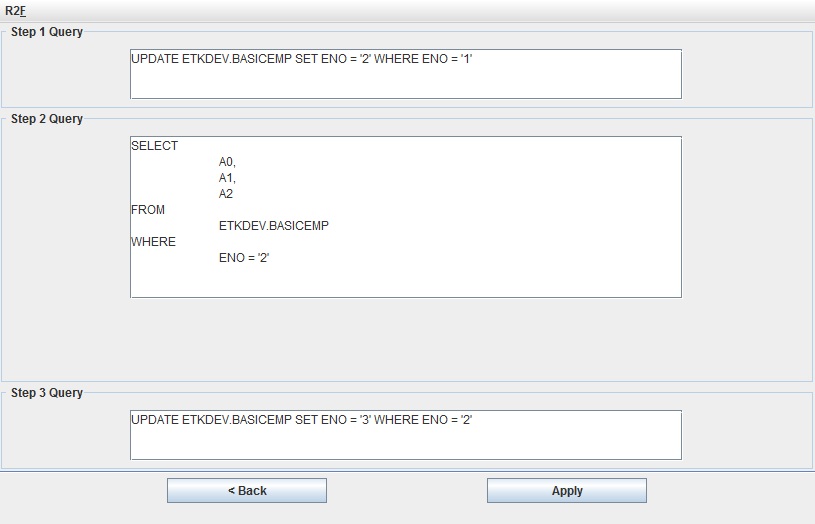
R2F_QueryPanel_101

Note : The above queries can be edited / modified.

In This Section

R2F Menu Options

See Also

Nodes Configuration

Configuring R2O

Configuring O2R

Using Middleware (Publish / Subscribe)

Configuring F2ORA

Configuring FTP Node

Configuring Sequencer Node

Configuring F2Mail Node

Configuring Mail2F Node

Configuring XL2File Node

Configuring X2O Node

Configuring Viewer Form Node

Saving the Model

Generating a Report

Creating a New Category

Assigning a Category to an Application

Verifying Category Creation